To access the Scheduler Settings, you must have Company Admin access or have been given access by a Company Admin.
To learn more about Access Levels, click here.

- Go to the Schedules icon in the top menu
- Click on the Employees link
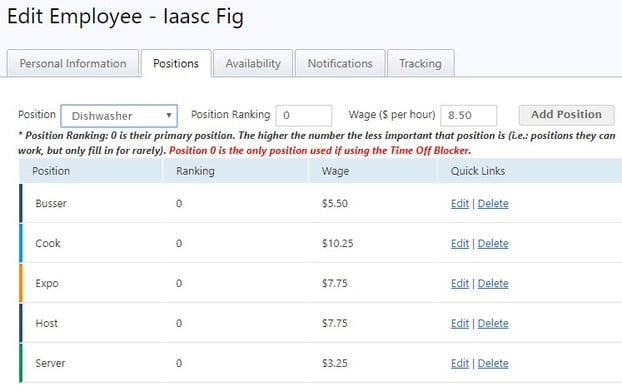
- Select the employee you would like to add positions for, and hit either the Set Position(s) link if the employee does not have positions assigned to them yet, or the Edit link next to their name.
- Select the Positions tab
- Choose a position from the drop down menu (the positions were added during the setup process, you can go back and add more at any time.)
- Add a number to show order of importance. 0 being the most important, 1 the next, and so on. When the auto scheduling feature is being used, the positions with a higher importance will be scheduled first.
- Add or edit the wage the employee makes per hour. If you do not wish to include a wage, leave this field blank.
- Hit Add Position
